If you’re planning a trip to the Lake Tahoe area, or any similar mountain wilderness destination, here are some suggested tools, training, and tips that will help with the unique terrain and conditions. If you have any questions, feel free to contact us.
General Camera Considerations
There are many wonderful opportunities for macro photography in the Lake Tahoe area. Plants, flowers, trees, rock surfaces, and more. For these photos, you probably won’t need a tripod, special lens, or special camera. This is because smaller camera sensors found in smartphones and pocket cameras are proportionately not much smaller than the subject. Newer smartphones can actually do surprisingly well with most photos, especially if you’re sharing photos in lower resolution on Instagram or elsewhere online.
However, there are plenty of landscape and panoramic photos that can benefit from a nicer larger sensor APS-C or full-frame camera. Medium format cameras or large format cameras will do a better job of reproducing expansive landscapes because there is so much information that the camera is trying to capture with many miles of visibility. A larger sensor camera can produce larger print or on-screen images with good sharpness.
If it’s windy, and you’re taking photos of trees or flowers at a distance, their motion could result in a seemingly blurry result. Using a faster shutter speed can help and may be needed anyway if it’s a bright sunny day.
Consider Rentals
It’s possible to rent nicer cameras and lenses for special occasions and trips. Explore various services like BorrowLenses.com to consider your options. There are tradeoffs with renting. For example, you may be more familiar with your own camera operation.
Tools and Accessories
The following tools and accessories can be of help when taking photos in the Lake Tahoe area:
- Batteries. You may be away from power for many hours during the day, so having one or two extra camera batteries can help.
- Camera Gimbal Stabilizer. While the focus of this article is on still photography, you may wish to record video as well. To do so, you’ll need a camera gimbal stabilizer to ensure smooth flowing video. Particularly when hiking on trails, if you rely only on the built-in camera stabilization, whether optical or digital, you will likely get shaky video.
- Camera SD Memory. You may get into a habit of copying your camera’s memory card to a laptop computer daily. Or, if you’re traveling light and won’t have any way to copy your photos to an external device, you may want to have some extra SD memory cards. The capacity of the cards, and the number of cards to bring, depends on the file size of photos created by your camera. Also, if you’re saving as JPG and RAW you’ll need more storage.
- Food Bars. Some of the more scenic areas are only accessible by trail, and some of the hikes could take two hours or more, so having nutritious snacks can help. You might enjoy the Tahoe Trailbar with natural ingredients, available locally. Be sure to keep your wrappers and not leave any trash behind.
- GPS. It’s becoming more difficult to find cameras with GPS built-in. The Canon 6D Mark II full-frame and Sony DSCHX90V pocket camera both have GPS. Cameras without GPS built-in rely on cumbersome smartphone apps to be used. Having your location information embedded with the photo is really helpful when sorting through photos later. You can quickly identify the mapped location of your photos.
- High Dynamic Range. Because of the bright sunlight and darker shaded areas, with bright skies, dark trees, and dark water, you may find that the dynamic range of light in your photos results in only part of your photos being properly exposed while other areas in the photo are too dark or too bright. You may want to consider high dynamic range software such as TrueHDR. Despite some negative reviews recently, the app has proven to work fine for photos taken on the iPhone. For higher quality results, Adobe Lightroom allows for HDR through merging multiple photos taken with different levels of exposure.
- Hiking Gear. This document doesn’t cover all the items you’ll want while hiking. You’ll want to give thought to the hiking gear you’ll want. A few examples are given here such as sun protection and water. Give additional thought to what you’ll need along the way. The training prior to travel will help you identify items that may be helpful.
- Lens Cleaning Cloth. A good lens cleaning cloth will be important. There can be dust and debris kicked up as you hike, so you’ll want to make sure the lens stays clean.
- Light Reflectors. If you’re planning any portrait photography, the stark bright direct sunlight that’s typical in Lake Tahoe may result in photos with harsh lighting. Photos taken in the shade will actually have abundant light, but to make photos ‘pop’ you can consider a set of small light reflectors. These are inexpensive, small, pack easy, and don’t weight much. [View light reflectors on Amazon]
- Polarized Filter. Due to the terrain making distant shorelines and mountains visible, there is likely to be some natural haze accumulation over longer distances. At times, wildfires west of the Tahoe area can result in residual smoke. This will generally result in photos that have a hazy look for distant objects. A polarized filter may help reduce haze and glare. In the same way that nice sunglasses make everything look more saturated, a polarized filter can help reduce that washed out look in photos. Depending on the optics and conditions, a polarized filter could result in some objects appearing to be not as sharp. A polarized filter screws on your existing lens and is designed to be turned and adjusted. You’ll need to find the right size filter to fit your lens. Be careful not to screw the filter on too tight because it’s possible for the threads to get stuck making it difficult to remove. [View polarized filters on Amazon]
- Power Pack. Being in a remote area means not having easy access to power for recharging your smartphone and other accessories. Also, in remote areas where your phone signal is weak, the phone will boost its power, causing the batteries to deplete faster. For these reasons, it’s helpful to have a power pack. Anker power packs have smart USB charging, so they adapt to whatever device is plugged into them. You may prefer another brand. [View portable chargers on Amazon]
- Sun Protection. Be sure to have high quality sunglasses, protective hat, a long-sleeve white shirt, and gloves to protect your eyes and skin from the intense bright light during long hikes. At higher altitudes on very clear days, the sun seems more intense. Some styles of fishing hats offer a wide front brim and side flaps to protect your face and neck. You’ll want to have some wrap sunglasses that help block light from the sides as well. The Maui Jim Big Wave sunglasses with Blue-Polarized lenses would be a good choice. They offer exceptional visibility and can even be left on while taking photos, yet they also provide excellent protection from the sun. The polarization of the lenses is designed so as not to hinder viewing smartphones, camera displays, or car displays. These are available on Amazon and also from the Sunglass Hut in South Lake Tahoe.
- Telephoto Lens. For most photography, it’s possible to step back or get closer to frame in the shot. However, with birds in distant tree tops, boats on the water, or other distant objects, a telephoto lens can be essential. A pocket camera like the Sony DSCHX90V comes with a built-in 30X optical zoom lens for great wilderness closeups. With a DSLR, you may need to purchase or rent a specialized telephoto lens. Look for dust and moisture resistant lenses. For example, the Canon 6D Mark II can be ordered with a standard 24-105mm lens or a higher quality 24-105mm lens for about $500 more. The higher quality lens is sealed to better resist dust, water, and other contaminants. If you have questions about what to get, feel free to contact us.
- Tripod. The mountainous terrain offers great views of distant landscapes. A tripod can help increase clarity of distant objects when taking wide landscape photos with mountains and trees far away. Consider that any slight movement of your camera, even with image stabilization, results in an even greater movement a mile away. So, tripods can really help with such photos. A monopod is a single stabilizing leg for your camera. However these can sometimes be less stable than a tripod. [View tripods on Amazon]
- UV Filter. If you find that the polarizing filter doesn’t improve your photos and appears to be hindering the clarity, you may find that just using a UV filter is sufficient. A quality UV filter should not hinder the clarity of your photos, and will offer some protection for your lens. It provides an easy to clean flat surface so when you clean your lens there’s less risk of scratching the actual camera lens surface. With DSLR cameras, if you’re looking through the viewfinder, a UV lens can help reduce harmful light.
- Water. The generally dry climate combined with great outdoor scenery will result in you wanting to just keep hiking and hiking, making dehydration a problem and heat exhaustion a possibility. So be sure to carry plenty of water and drink frequently.
Set Your Camera Date and Time
Be sure to set your date and time for the local timezone that you’re in. This will make it easier to identify when and where photos were taken.
Start Early
Starting out early will give you cooler weather for hiking, less traffic, more available parking, and fewer people. There should also be better light in the early morning. In the summer months, an optimal time of day would be from just before sunrise (around 5:30 AM) through about 9AM or 10AM. At that point, the sun will appear to be high in the sky. It will be hot, hazy, and streets will be busier. Hiking in the heat of the day can result in fatigue.
Consider Photo Uses
Rather than only thinking of traditional framed photos, or snapshots to share on Instagram, consider broader uses of your photography. What textures or images might be interesting to use as a header on a website, or background to a book cover? Consider taking landscape, portrait, and panorama variations of photos when appropriate. Take photos with the subject centered, but also left or right of center.
Physical Conditioning
Most parks and wilderness areas offer plenty of scenic views accessible by car. However, to get more interesting views, you’ll probably want to hike available trails and perhaps rent a bicycle to get access to even more areas. The more training and physical conditioning you have ahead of time the better.
Much of the terrain along the shoreline of Lake Tahoe is flat. For example, if you’re planning to stay in the South Lake Tahoe area, and won’t be venturing too far from the area shops, restaurants, and beaches, then training with plenty of walking should be sufficient.
However, if you’re planning to hike up any of the nearby trails, the terrain can be quite steep and some trails can be several miles. Some of the more interesting hikes will require more stamina and may be on uneven trails with rocks, roots, and other obstacles. So, training with stair climbing and walking up steep hills would be a good training regimen.
When training, remember to carry your camera gear, water, food, and other items that you’d be packing while traveling. This will replicate the same bulk and weight that you’ll be carrying while in the Tahoe area.
Intermittent fasting is also helpful preparation because it conditions your body to be without food for periods of time. An empty stomach and generally lighter smaller meals will result in more energy because your digestive system can take a break. You may want to consider a ketogenic diet because it trains the body to use fat for energy rather than sugar and carbs. As a result, the body has more enduring energy according to those who follow the diet. Always consult your physician before making any changes in diet.
By training ahead of time, you’ll find that you’ll be able to do more, see more, and enjoy more.
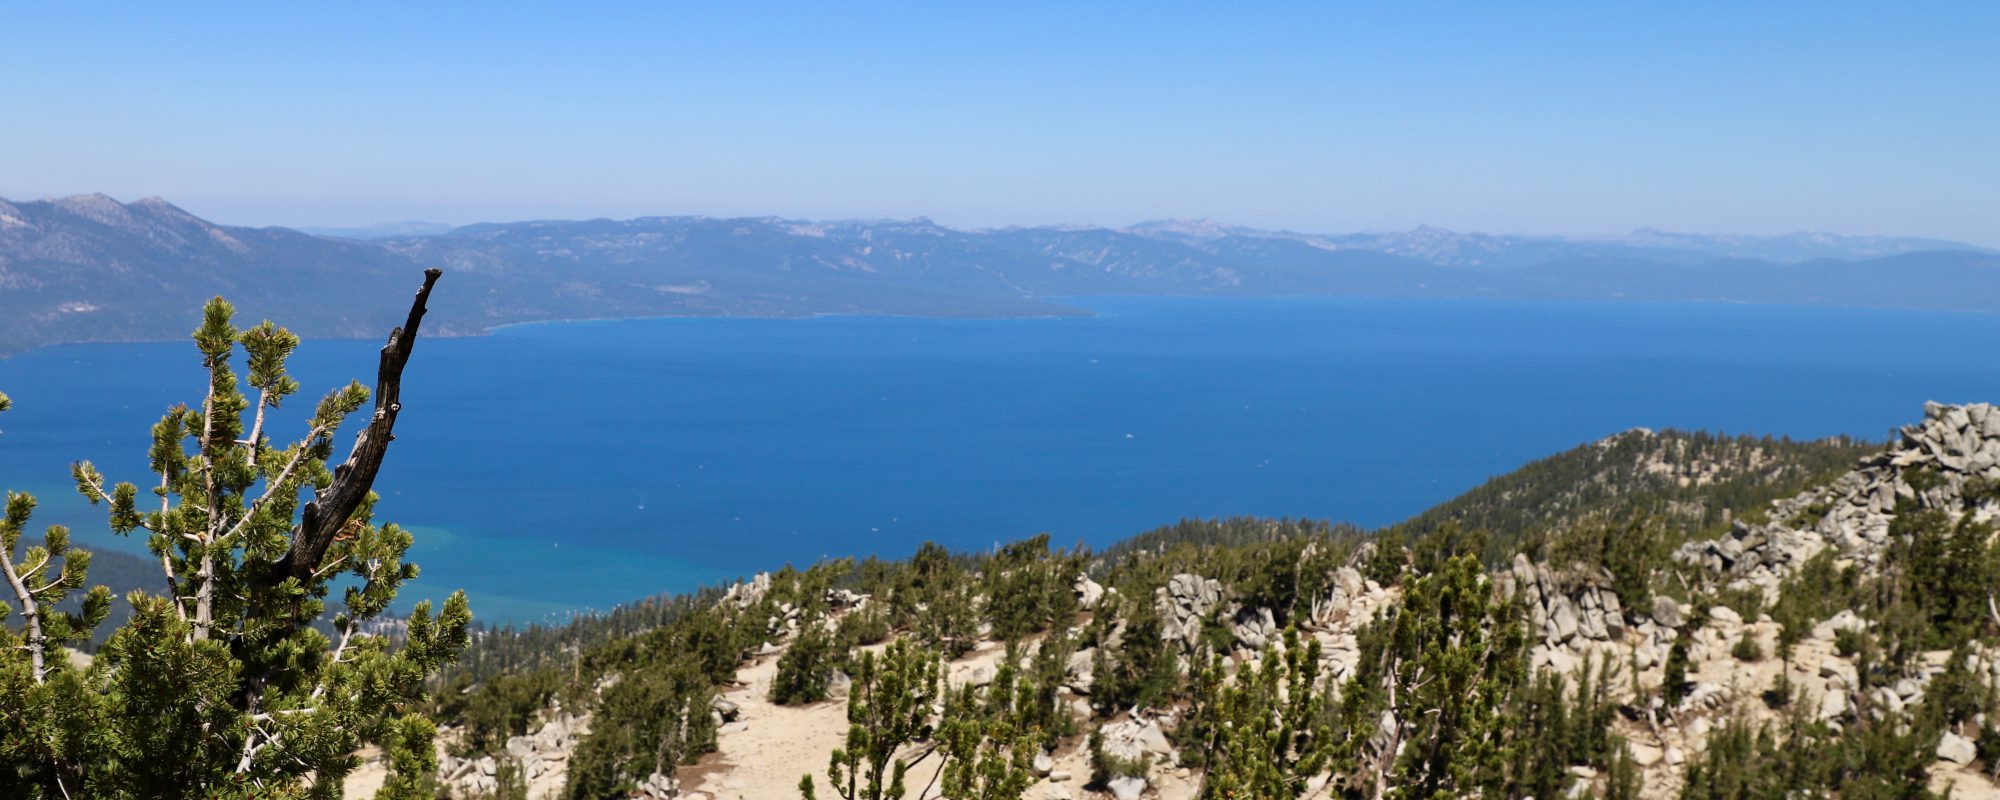
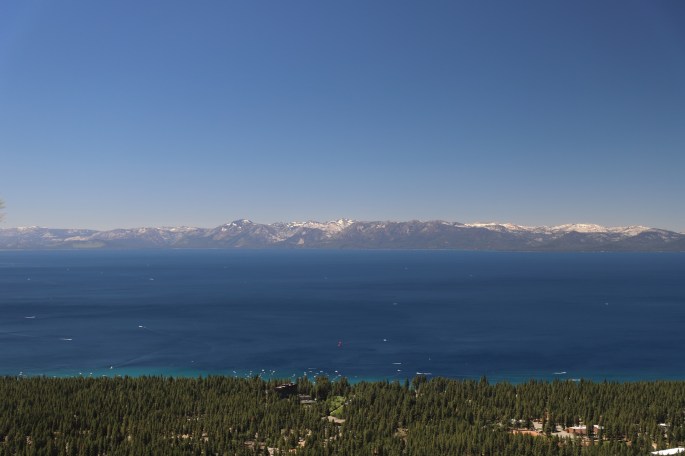
Sample Photos
Here are some sample photos with descriptive captions that relate to the points made above. Click any image for a larger gallery view. These photos have been reduced to 1920 pixel width resolution.


